Uncategorised
the finish startS here
Tuesday 13 September 2016Rust is the natural enemy of the car, and the most dreaded word in the auto body restoration industry. However, it is treatable. Short of major car rust removal techniques involving cutting out and replacing large sections of car panelling – there are other options for treating rust on cars that you can do from home with the right instructions, materials and a bit of handy-man know-how. Continue reading!
What You’ll Need for Repairing Rust on Cars:
- Wax and Grease Remover
- Glass Fibre Filler
- Car Body Filler
- Rust Converter
- A Panel Hammer
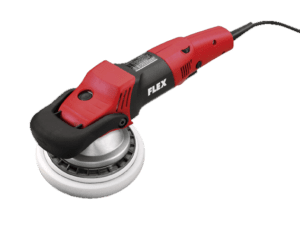
- Sanding Block or Electric Sander
- Sand Paper or Sanding Discs
- Small Paint Brush
- Plastic/metal Mixing Applicator
- Safety Gear
*If unsure, contact the professionals at Bodyshop Paint Supply Bayswater and ensure you get the right product for the job. Please ensure you use the correct safety gear before proceeding, including protective eyewear and dust mask to avoid hazardous paint particles.
Step 1 – Preparation
Start by completely removing all contaminants from the panel surface by applying a wax and grease remover with a clean, dry cloth; wiping clean with another.
Step 2 – Removing the Paint
Use a machine or hand sander with around 24-36-grit sandpaper to remove the paint from the rusted area and the approximate 50mm surrounding. If you have loose sections of rust on the panel, use a panel hammer to make sure it is all removed.
Step 3 – Treating Rust
Use a small paintbrush to apply rust converter to the affected areas. Do not apply rust converter to clean or painted metal surrounding rust. Wait for surface to completely dry before proceeding.
Step 4 – Applying Glass Fibre Filler
Use your applicator to mix the required amount of glass fibre filler, using a one-part hardener to fifty-part filler ratio (or in tradie terms, “a golf ball to a pea”). Once mixed, immediately apply a thin layer over the repair surface, and continue to gradually apply filler over the top until the repair area is slightly more built-up than the rest of the surrounding panel.
Step 5 – Sanding Back
After 20-30 minutes (if mixed correctly) the filler should be fully cured, and you can proceed with a machine or sand grinder to sand back until filler is level with the surrounding panel. Use around 40-80 grit sandpaper, and do not begin until filler is completely cured.
Step 6 – Apply Car Filler
Although you’ve already applied fibre filler, these are only a patching filler, and you should still apply car filler for optimal results. Clean the surface thoroughly with compressed air or a clean dry cloth, and repeat steps 4 and 5 using car filler instead of fibre filler.
Note:
Car filler can be reapplied if further filling is required, but cannot be wet sanded, as it is very porous and this will cause rust under your repair. Be careful to not apply filler to painted surface, as this won’t dry properly and will have to be removed.
Final Step
Finally, feather sand the repair surface with 120-180 grit sandpaper until you have a smooth panel surface. You have now completed the rust repair process on your car panel, and are ready to prime/paint!


