


Uncategorised
FAQ’s: Automotive Painting and Car Restoration
Monday 12 September 2016Q. What is the correct sand paper grit that should be used when preparing for Acrylic paints, two pack solid colours and two pack clear over base?
When preparing bodywork for top coating of Acrylic Paint, two pack solid colours and two pack clear over base paints, it is extremely important to use the correct grade/grits of sand paper. Too fine can lead to poor adhesion – too course can lead to deep scratches showing through the paint, or shrink back of the paint into the course sanding scratches. An easy guide for Solid Colours (white, red, blue etc) regardless if it is acrylic or two pack, is to finish off with no courser than 600 wet and dry, or 400g dry sand paper. Of course if you are worried that 600 wet and dry is too course, you can go one step finer and finish it with 800 grit, but certainly no finer. The same applies to Metallic or Pearl colours, regardless of if it is Acrylic or two pack base coat: these colours should be finished off prior to painting with no courser than 800 grit wet and dry paper, or 600 grit dry rub paper. As with the solid colours, you can go a step finer and finish with 1000 grit wet and dry, but any finer can potentially lead to poor adhesion of the paint to the substrate.
Q. What is the correct preparation for painting bare aluminium?
When it comes to painting bare aluminium, it is important to remember that (similar to vinyls, plastics and fibreglass) bare aluminium is nonporous, requiring abrasive preparation in order for paint to adhere to the surface. Unfortunately, unlike these other nonporous surfaces, aluminium is hard and durable, and may require heavy-duty grinding or blasting techniques – before applying a primer to act as a tooth for the paint to adhere to. Grinding Using a 220-grade sandpaper and orbital sander, abrade the surface back to bright, silver aluminium surface – completely free of grey oxidisation. Important: Be careful using rags to clean grinded surface, or rollers to apply primer, as microfibers can contaminate the surface. Compressed air, water or vacuum is preferred. Blasting Soda-blasting on sandblasting techniques can be used to abrade the surface similar to the hand grinding process above. Blasting machinery or professional assistance can be hired. Important: Plan your work schedule carefully, as both grinding and blasting require priming to commence in the same work-shift Failure to prepare the surface properly will result in paint not sticking, and easily shedding from the surface.
Q. What is the correct preparation for preparing bare metal for paint?
In order to prepare bare metal for painting, the surface of the metal needs to be etched and primed in order for the paint to have an adequate surface to adhere to. This can be done using: Epoxy Primer – which firmly adheres to the metal surface like glue, but requires manual etching before being applied in the form of sanding, grinding or blasting, in order to bond to the surface, or Self-Etching Primer – which uses acid to chemically corrode and micro-etch the metal surface, creating a solidly bonded base on which to paint over.
Q. To etch prime or epoxy prime?
The decision for using self-etching or epoxy primer is regularly debated, and while both yield successful results, the verdict needs to be made with consideration to:
- The condition of the surface you’re painting
- The time and effort you can afford to devote to the project
- Your budget
Generally speaking: Etch Primer is recommended to save time on surfaces in good conditions that wont require much additional filling, or small parts or panels with hard-to-reach areas you might struggle to manually scuff. Epoxy Primer is generally preferred by restoration shops on surfaces that require a bit of work, as you can apply body filler on top of the epoxy primer, and then re-prime as required, and continue on with sanding, top coating etc. However the process takes longer to cure than self-etching primer.
Q. Do I need to high fill over polyester and can I wet rub polyester?
Spray Polyester is commonly used in the restoration side of the industry, basically acting as a liquid or spray on body filler. Because of its extremely high solid polyester properties, it has outstanding build and filling abilities. However, it is important to keep in mind that being a polyester product, it is very porous, and therefore – DO NOT WET RUB POLYESTER! Spray polyester definitely needs to be high filled (primed) over thoroughly, to ensure that the porous polyester surface is completely sealed and isolated from any moisture that could potentially penetrate through to the bare metal – which in turn could create the scariest word in body restoration… RUST!
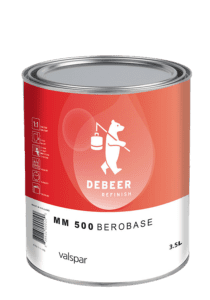
Q. Can I paint 1k (acrylic paints) over existing 2-pack paint, and visa versa?
Rule of thumb is simple, NO. However, it does get done quite frequently, especially when older cars are being repaired in modern day smash repair shops that only use two pack paints. Basically, two pack paints and acrylic paints are designed to be able to be used over and under one another, so as to not have adhesion issues with the chemical bond of the two materials not cross-linking. However, it is generally not recommended to achieve optimal results.
Q. How much paint do I need?
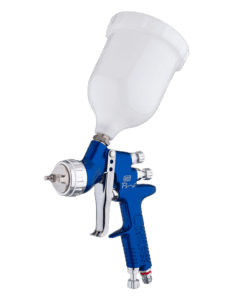
It’s a great question… and a hard one to answer, as obviously is it impossible to predict exactly how much paint you’ll need, with every job requiring different amounts. However, rule of thumb for a medium sized car is approximately: – 250ml per side panel (door, guard etc) – 500ml per Bonnet, Roof panel or Boot The best way to obtain an accurate estimate before spending money on your paint is of course to spray a coat or primer over the entire car. This gives you an idea of how much paint is required to cover the car, and in most cases, you were going to have to prime before painting anyway! CONTACT Bodyshop Paint Supplies Bayswater for details or assistance with your specific job, to make sure you only buy the amount of paint you really need.
Q. What temperature is ideal for painting? Is the ambient temperature more important or the actual panel temperature?
Because there are a number of factors that impact the drying time for any particular paint job, such as the type and amount of paint you’re using… it is hard to give a defined ‘recommended temperature’ for panel painting. Having said that, most automotive paints will come with the same ideal ambient and panel temperature of 22°C. Anything above and below these temperatures, drying time and cross linking can be radically affected. Different paints will use different catalyst and reducers to compensate different temperature for curing time… and professional spray booth can use controlled temperatures to adjust curing times while applying coats. Ambient and Panel temperatures are equally as important when it comes to painting… Basically, you can’t have one without the other, as you need ambient temperature to heat up the panel temperature. However, you should be wary of starting with a panel temperature much high or lower than the ambient temperature (if the panel has been stored outdoors for example), as this will dramatically affect curing.
Q. What is the correct procedure in preparing bare plastics (bumpers) for painting?
Preparing plastic car parts, such as bumpers, for painting requires a process of cleaning, sanding, cleaning, priming,… before you’re ready to start painting. Of course, the condition of the new bumper you’re working on will determine variables such as puttying or heavy sanding, but the general steps are as follows: Step 1: Clean the bumper with a water based degreaser. Ideally a waterbased anti-static cleaner to remove all grease, dirt and grime. Step 2: Start lightly sanding the now clean, bare plastic with grey scotchbrite, water and scuff paste (abrasive paste that works as a soap and abrasive cleaner) until it is completely lightly sanded, then hose off with clean water. Wipe excess water and blow off with air gun to ensure the part is 100% dry Step 3: Clean the surface again using the same anti static degreaser/cleaner to ensure the bumper is 100% clean and free from any contaminants. Step 4: lightly blow off the bumper with an air blower, and using a low tack tack cloth, gently wipe over the entire surface to remove any light dust that may have settle. Step 5: Prime your bumper using a specialised, single pack plastic primer, making sure you have a complete, thin and even coat over the whole part. Leave to dry completely. (which should take only a matter of minutes depending on temperature) Step 6: you are now ready for painting!
Q. What is the correct way of treating rust?
As mentioned earlier, RUST is the scariest word in the restoration industry. This is because the only fully affective way to treat rust is to remove it completely by cutting out rusted sections, and replacing them with welded steel patches. However, this is not always an option due to cost, time, effort and the size of the affected area. CLICK HERE for some basic steps that will help you treat rust with a more “band-aid”, yet affective fix.
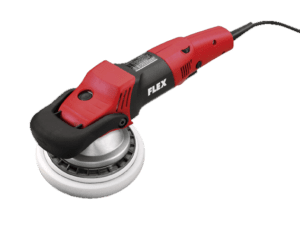
Q. How soon is too soon to sand down (denib) and cut/polish fresh paint?
As a general rule – after you have left your paint to dry… put your nose close to the freshly painted surface, and if it still smells like paint, it’s too soon to polish. However it not as easy as just being a paint sniffer. Other factors do come into it, like what type of paint is it? Was it baked in a spray booth oven? How many coats were applied? In most cases, the longer you leave it, the better. Although there are circumstances where if you leave it too long, it will be rock hard and harder to polish/cut. Keeping these above factors in mind, if its Acrylic paint, a safe bet would be 3-4 weeks, and two pack paints (if baked) around a week. The only issue you will come across if you cut fresh paint too early in to its drying time, is potentially slight fading (sink back of sanding scratches) which will cut out quite easy with another buff. This just means the solvents weren’t completely dried out of the paint work. For expert advice and assistance, contact Bodyshop Paint Supplies Bayswater, and hire a spray booth today.
Q. What is the correct procedure for denibbing / flattening back two-pack or acrylic paint for polishing?
Generally, depending on how ‘orange-peely’ the paint is, and how flat of a desired finish you are after… you can start sanding out (denibbing) with 1200g wet and dry for the little bits of dust (or perhaps mosquitoes if you’re painting in your shed at home!). You can then follow with 1500g to 2000g over the entire panel, including the 1200g sanded areas, until the panel is nice and smooth and as flat as you desire. It is highly recommended not to start the process with any grade of paper courser than 1200g, as you will have a fight on your hands when it comes to removing the sanding scratches. However, you can definitely finish finer than the 2000g suggested, with it not being uncommon in most panel shops these days for painters to finish off in as fine as 5000g. The finer you finish off your sanding/denibbing, the easier it is to cut/buff the paint back up to shine! Contact Bodyshop Paint Supplies Bayswater for further information or enquiries about auto sand paper abrasives, or come in to our expansive retail shop to browse our range of products and receive expert advice if required!
Q. What is the correct grits of sand paper to use on bare metals to be primed?
Generally, the courser the better, but not so course as to completely destroy the surface! On a bare metaled respray that is being prepared for etch, epoxy or self-etching primer, start with 80g and finish it off no finer than 180g. If you go too fine, it can lead to adhesion problems.
Q. Can I paint over chrome?
Painting over chrome can be difficult, as by definition chrome is a smooth and shiny surface, which paint will not take well to. However, it is certainly possible to paint over: Start by sanding back the shine off the surface of the chrome, using either a gritty sandpaper like 120g-150g, or if sanding wont yield results, you can use a media blaster – which uses pressurised air to send tiny particles at a surface to strip paint from base metal. Then wipe down and degrease the surface thoroughly using a prewash, before applying a complete and even layer of epoxy primer or etch primer, that will adhere to the surface, offering an anchor for paint to be sprayed on to.
Q. Can I paint over powder coat?
You definitely can, however, there is a million different types of powder coat so testing will need to be carried out. Most bulbar companies in Australia paint over powdercoat by simply sanding back the powder coat with 320-400g to a smooth surface, then either prime or use an adhesion promoter like Valspar Z777, and paint away!